
Coding Note
스프링 시큐리티와 Oauth2.0 - 구글 로그인 기능 구현하기 본문
구글 로그인 인증 정보를 발급받았으니 로그인 기능을 구현할게요!!
1. User 엔티티 관련 코드 작성
User 클래스 생성
domain 패키지 아래 User 패키지를 만들어 패키지안에 클래스를 생성함.
- User
@Getter
@NoArgsConstructor
@Entity
public class User extends BaseTimeEntity {

    @Id
    @GeneratedValue(strategy = GenerationType.IDENTITY)
    private Long id;

    @Column(nullable = false)
    private String name;

    @Column(nullable = false)
    private String email;

    @Column
    private String picture;

    @Enumerated(EnumType.STRING)
    @Column(nullable = false)
    private Role role;

    @Builder
    public User(String name, String email, String picture, Role role) {
        this.name = name;
        this.email = email;
        this.picture = picture;
        this.role = role;
    }
    public User update(String name, String picture) {
        this.name = name;
        this.picture = picture;

        return this;
    }

    public String getRoleKey() {
        return this.role.getKey();
    }
}
@Enumerated(EnumType.STRING)
- JPA로 데이터베이스로 저장 할때 Enum 값을 어떤 형태로 저장할지를 결정함.
- 기본적으로 정수로 저장하는데 숫자로 저장되면 데이터베이스로 확인 시 그 값이 무슨 코드를 의미하는지 알 수 없다. 그래서 문자열(EnumType.STRING)로 저장될 수 있도록 선언 필요함.
- Role
user패키지에 Enum 클래스 Role 생성하여 사용자의 권한을 관리한다.
@Getter
@RequiredArgsConstructor
public enum Role {

    GUEST("ROLE_GUEST", "손님"),
    USER("ROLE_USER","일반 사용자");

    private final String key;
    private final String title;
}
스프링 시큐리티에서 권한 코드에 항상 "ROLE_"이 앞에 있어야 된다.
- UserRepository
user의 CRUD를 책임진다.
public interface UserRepository extends JpaRepository<User,Long> {
    Optional<User> findByEmail(String email);
}
findByEmail
- 소셜 로그인으로 반환되는 값 중 email을 통해 이미 생성된 사용자인지 처음 가입하는 사용자인지 판단하기 위한 메소드
2. 스프링 시큐리티 설정
build.gradle에 스프링 시큐리티 관련 의존성 추가
//스프링 시큐리티
implementation 'org.springframework.boot:spring-boot-starter-oauth2-client'
- 소셜 로그인 등 클라이언트 입장에서 소셜 기능 구현 시 필요한 의존성
OAuth 라이브러리를 이용한 소셜 로그인 설정 코드 작성을 위한 관련 패키지를 별도로 생성한다.

- SecurityConfig
@RequiredArgsConstructor
@EnableWebSecurity
public class SecurityConfig extends WebSecurityConfigurerAdapter {

    private final CustomOAuth2UserService customOAuth2UserService;

    @Override
    protected void configure(HttpSecurity http) throws Exception {
        http
                .csrf().disable()
                .headers().frameOptions().disable().and()
                .authorizeRequests()
                .antMatchers("/", "/css/**", "images/**",
                        "/js/**", "/h2-console/**").permitAll()
                .antMatchers("api/v1/**").hasRole(Role.USER.name())
                .anyRequest().authenticated()//인증된 사용자들에게만 허용 - 로그인한 사용자만!
              .and()
                .logout().logoutSuccessUrl("/")//로그아웃 성공 해당 주소로 이동
              .and()
                .oauth2Login().userInfoEndpoint().userService(customOAuth2UserService);
    }
}
< 코드 정리 >
@EnableWebSecurity
- Spring Security 설정들을 활성화함.
csrf().disable().headers().frameOptions().disable()
- h2-console 화면을 사용하기 위해 해당 옵션들을 disable()로 설정함.
authorizeRequests
- URL별 권한 관리를 설정하는 옵션의 시작점임
- authorizeRequests가 선언되어야만 antMatchers 옵션을 사용할 수 있음.
antMatchers
- 권한 관리 대상을 지정하는 옵션
- URL, HTTP 메소드별로 관리가 가능
- "/"등 지정된 URL들은 permitALL() 옵션을 통해 전체 열람 권한을 줌
- "/api/v1/**"주소를 가진 API는 User 권한을 가진 사람만 가능함.
anyRequest
- 설정된 값들 이외 나머지 URL들을 나타냄
logout().logoutSuccessUrl("/")
- 로그아웃 기능에 대한 여러 설정의 진입점
oauth2Login
- OAuth2 로그인 기능에 대한 여러 설정
userInfoEndpoint
- OAuth2 로그인 성공 이후 사용자 정보를 가져올 때의 설정을 담당
userService
- 소셜 로그인 성공 시 후속 조치를 진행할 UserService 인터페이스의 구현체를 등록함
- 리소스 서버에서 사용자 정보를 가져온 상태에서 추가로 진행하고자 하는 기능을 명시함.
설정 코드를 완료했으니 CustomOAuth2UserService 클래스를 생성하여 사용자 정보들을 기반으로 가입, 정보수정, 세션 저장 등의 기능을 지원하는 코드를 작성한다.
- CustomOAuth2UserService
@RequiredArgsConstructor
@Service
public class CustomOAuth2UserService implements OAuth2UserService<OAuth2UserRequest, OAuth2User> {
    private final UserRepository userRepository;
    private final HttpSession httpSession;

    @Override
    public OAuth2User loadUser(OAuth2UserRequest userRequest) throws OAuth2AuthenticationException {
        OAuth2UserService delegate = new DefaultOAuth2UserService();
        OAuth2User oAuth2User = delegate.loadUser(userRequest);

        String registrationId = userRequest.getClientRegistration().getRegistrationId();
        String userNameAttributeName = userRequest.getClientRegistration().getProviderDetails()
                .getUserInfoEndpoint().getUserNameAttributeName();

     OAuthAttributes attributes = OAuthAttributes.of(registrationId, userNameAttributeName, oAuth2User.getAttributes());

        User user = saveOrUpdate(attributes);
        httpSession.setAttribute("user", new SessionUser(user));

        return new DefaultOAuth2User(
                Collections.singleton(new SimpleGrantedAuthority(user.getRoleKey())),
                attributes.getAttributes(),
                attributes.getNameAttributeKey());
    }
    private User saveOrUpdate(OAuthAttributes attributes) {
        User user = userRepository.findByEmail(attributes.getEmail())
                .map(entity -> entity.update(attributes.getName(), attributes.getPicture()))
                .orElse(attributes.toEntity());

        return userRepository.save(user);
    }
}
< 코드 정리 >
registrationId
- 현재 로그인 진행 중인 서비스를 구분하는 코드
userNameAttributeName
- OAuth2 로그인 진행 시 키가 되는 필드 값을 야기함. Primary Key와 같은 의미
- 구글의 기본 코드는 "sub"
OAuthAttributes
- OAuth2UserService를 통해 가져온 OAuth2User의 attribute를 담을 클래스
SessionUser
- 세션에 사용자 정보를 저장하기 위한 Dto 클래스
- OAuthAttributes
@Getter
public class OAuthAttributes {

    private Map<String, Object> attributes;
    private String nameAttributeKey;
    private String name;
    private String email;
    private String picture;

    @Builder
    public OAuthAttributes(Map<String, Object> attributes, String nameAttributeKey, String name,
                           String email, String picture){
        this.attributes = attributes;
        this.nameAttributeKey = nameAttributeKey;
        this.name = name;
        this.email = email;
        this.picture = picture;
    }

    public static OAuthAttributes of(String registrationId, String userNameAttributeName, Map<String, Object> attributes) {
        return ofGoogle(userNameAttributeName, attributes);
    }

    private static OAuthAttributes ofGoogle(String userNameAttributeName, Map<String, Object> attributes){
        return OAuthAttributes.builder()
                .name((String) attributes.get("name"))
                .email((String) attributes.get("email"))
                .picture((String) attributes.get("picture"))
                .attributes(attributes)
                .nameAttributeKey(userNameAttributeName)
                .build();
    }
    public User toEntity() {
        return  User.builder()
                .name(name)
                .email(email)
                .picture(picture)
                .role(Role.GUEST)
                .build();
    }
}
of()
- OAuth2User에서 반환하는 사용자 정보는 Map이기 때문에 값 하나하나를 변환해야 한다.
toEntity()
- User 엔티티를 생성
- SessionUser
인증된 사용자 정보만 필요함!
@Getter
public class SessionUser implements Serializable {

    private String name;
    private String email;
    private String picture;

    public SessionUser(User user) {
        this.name = user.getName();
        this.email = user.getEmail();
        this.picture = user.getPicture();
    }
}
설정 코드는 완료했으니 로그인 테스트를 진행해보자
3. 로그인 테스트
기존 index.mustache에 로그인 버튼과 로그인 성공 시 사용자 이름을 보여주는 코드 추가
 <!-- 로그인 기능 영역-->
    <div class="row">
        <div class="col-md-6">
            <a href="/posts/save" role="button" class="btn btn-primary">글 등록</a>
            {{#userName}}
                    Logged in as: <span id="user">{{userName}}</span>
                    <a href="/logout" class="btn btn-info active" role="button">Logout</a>
            {{/userName}}
        {{^userName}}
         <a href="/oauth2/authorization/google" class="btn btn-success active" role="button">Google Login</a>
        {{/userName}}
        </div>
    </div>
    <br>
< 코드 정리 >
{{#userName}}
- 머스테치는 다른 언어와 같은 if문(if userName != null 등)을 제공하지 않음
- true/false 여부만 판단함
- 머스테치에서는 항상 최종 값을 넘겨줘야 함
a href="/logout"
- SecurityConfig 클래스에서 URL을 변경할 순 있지만 기본 URL로 함
{{^userName}}
- 머스테치에서 해당 값이 존재하지 않는 경우에는 ^를 사용함
- 여기서는 userName이 없다면 로그인 버튼을 노출시키도록 구성했음
a href="/oauth2/authorization/google"
- 스프링 시큐리티에서 기본적으로 제공하는 로그인 URL
- 로그아웃 URL과 마찬가지로 개발자가 별도의 컨트롤러를 생성할 필요 없음
- IndexController
@RequiredArgsConstructor
@Controller
public class IndexController {

    private final PostsService postsService;
    private final HttpSession httpSession;

    @GetMapping("/")
    public String index(Model model) {
        model.addAttribute("posts", postsService.findAllDesc());

        SessionUser user = (SessionUser) httpSession.getAttribute("user");

        if(user != null){
            model.addAttribute("userName", user.getName());
        }
        return "index";
    }
}
(SessionUser) httpSession.getAttribute("user")
- 앞서 작성된 CustomOAuth2UserService에서 로그인 성공 시 세션에 SessionUser를 저장하도록 구성함.
if(user != null)
- 세션에 저장된 값이 있을 때만 model에 userName으로 등록함.
- 세션에 저장된 값이 없으면 model엔 아무런 값이 없는 상태이니 로그인 버튼이 보이게 된다.
< 결과 >
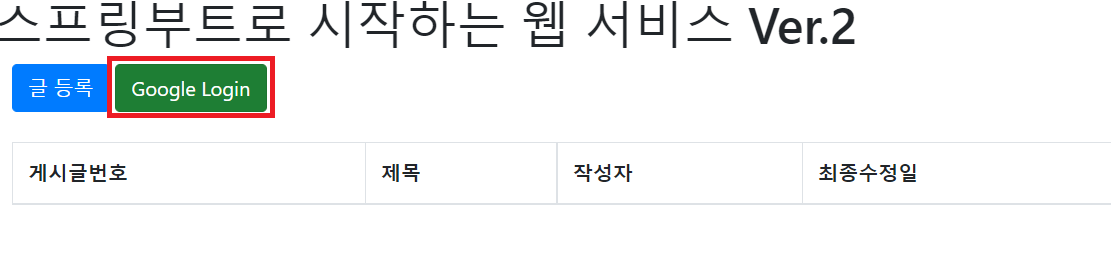


로그인 기능 성공
회원가입이 잘 되는지 h2-console에 접속해서 확인하기!

로그인 완료!!
'SpringBoot > AWS_PJ' 카테고리의 다른 글
| 스프링 시큐리티와 Oauth2.0_네이버 로그인 구현하기 (0) | 2022.03.16 |
|---|---|
| 스프링 시큐리티와 Oauth2.0_기능 개선하기 (0) | 2022.03.15 |
| 스프링 시큐리티와 Oauth2.0 - 구글 서비스 등록 (0) | 2022.03.14 |
| 게시글 조회/수정/삭제 기능 구현하기 (0) | 2022.03.09 |
| 게시글 등록 화면 구현하기 (0) | 2022.03.09 |


